


Building an Email/Password based authentication system with firebase is primarily an easy task than building it from scratch.
Suppose if we have to build an Authentication system from scratch maybe using Node and mongoDB for backend, we will have to write a lot of code to handle the authentication part that is we need to write code to store user information, will need to make sure that password does not get exposed in any sort of data breaches and for thit we can encrypt the password or even better to use hashing to protect the user information. And all of these requires a little extra effort to code, However for a coder these shouldn't be a great deal ☺️. Authentication becomes quit simpler using firebase that is we do not need to worry about password encryption or hashing and all of these can be done with much lesser code.
Okay, enough talking now let's jump straight into coding. Source code can be found here of this project and live demo of this project here.
step 1 :- Create an account in firebase which is free of cost, we only need to pay if we need some extra features. For our project we can use free plans of firebase.
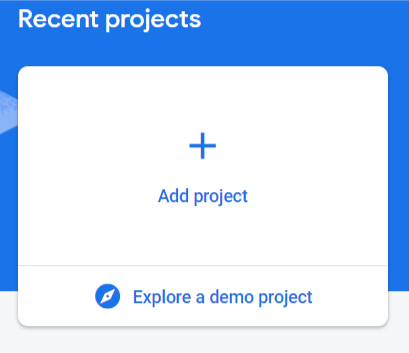
step 2 :- Go to firebase console and click on "Add Project".
step 3 :- Give a name to your project and click continue,
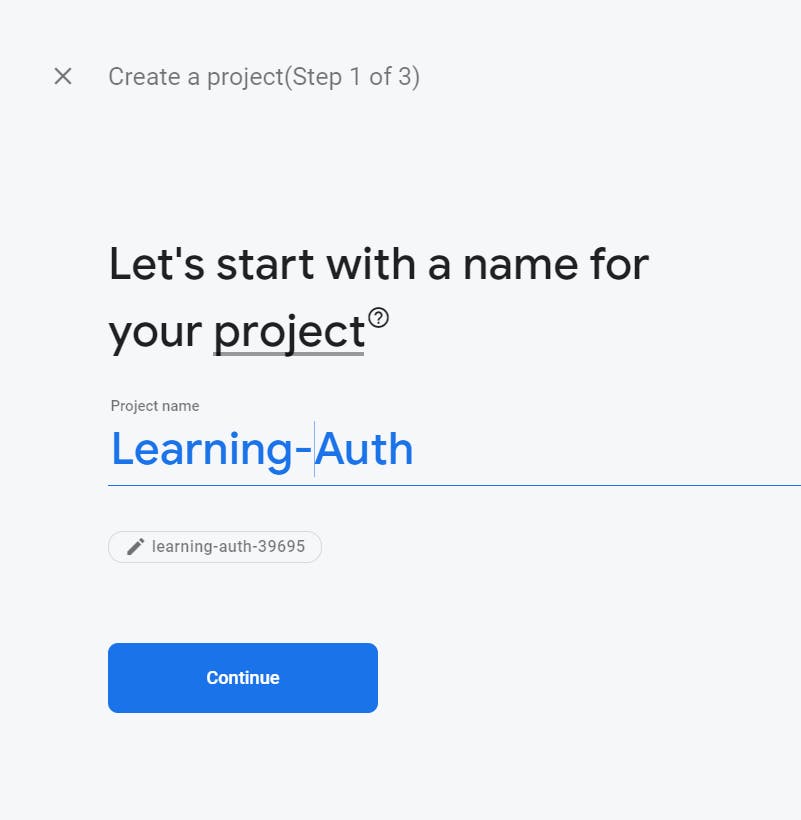
and create your project, after this it will be redirected to the console page of the project and boom we are almost halfway.
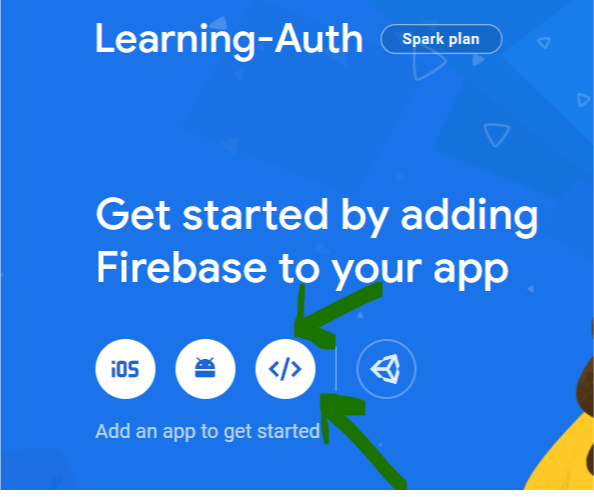
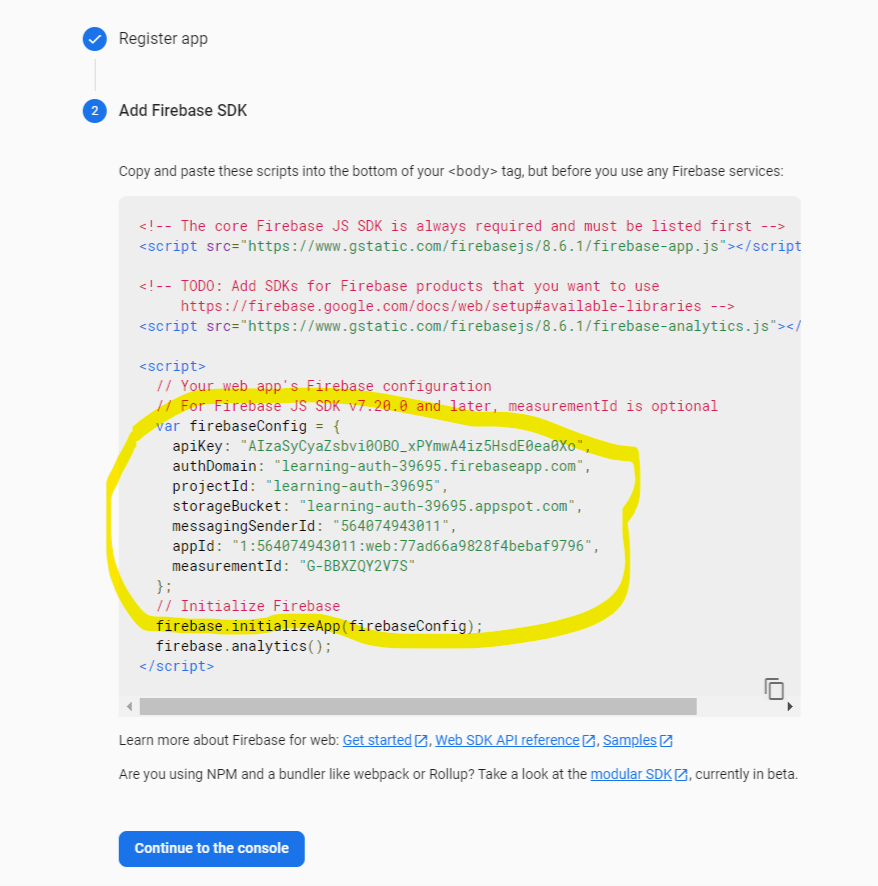
step 4 :- Click on the web Icon to add web app in our firebase project.
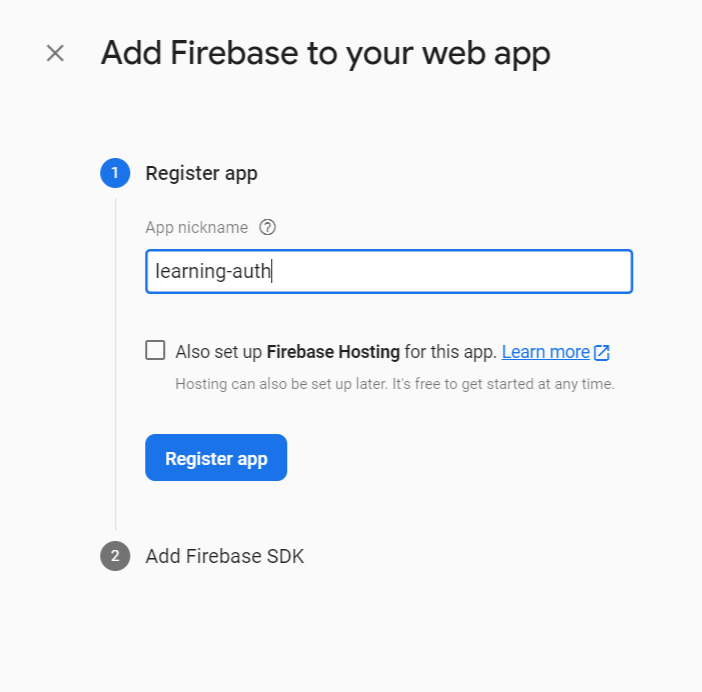
After registering your app you will get some config code of your project copy that somewhere for now and click on continue to the console button.
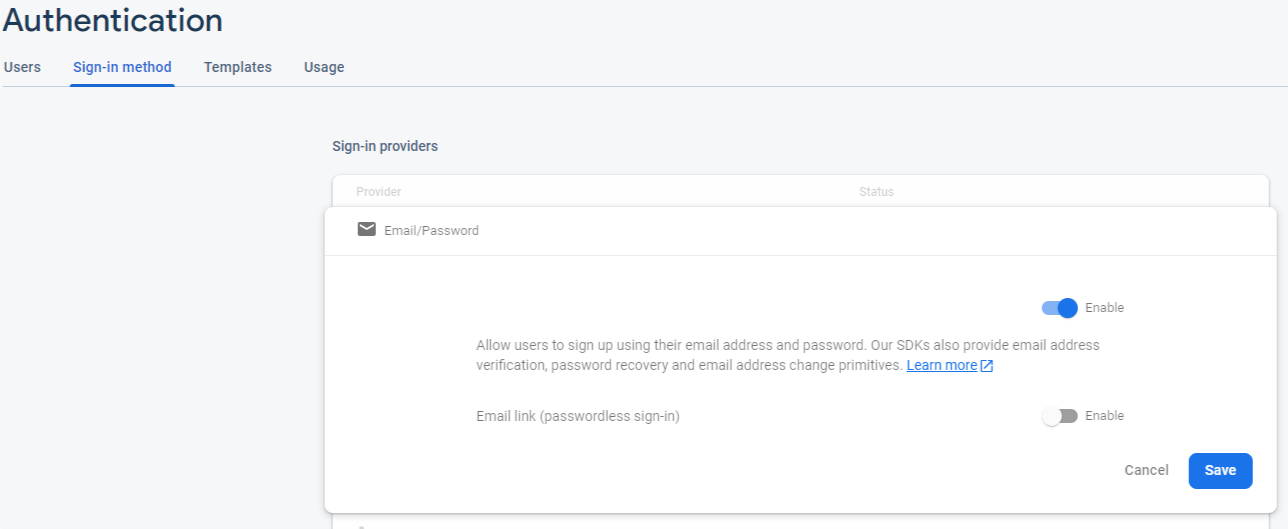
Since we are dealing with authentication, click on Authentication option available on the left side of the firebase console and then click on get started. You will see a lot of options are available there for authentication purpose. For this project we are working with Email/Password authentication therefore click on that option, enable it and save it.
Now we are almost done with setting everything on firebase. lets now jump into the coding part.
We are using react for this project so create a react app and remove all unnecessary code. we will be using useState, useEffect, Context API hooks to build our custom hook for handling the authentication.
Again lets make it stepwise process :-
step 1 :- create a firebase.js file in src folder and put the firebase config code inside it.
Note - don't copy/paste this config keys this will not work. put your own config key values here that you copied earlier.
import firebase from 'firebase/app';
import 'firebase/auth';

const app = firebase.initializeApp({
    apiKey: "AIzaSyCyaZsbvi0OBO_xPYmwA4iz5HsdE0ea0Xo",
    authDomain: "learning-auth-39695.firebaseapp.com",
    projectId: "learning-auth-39695",
    storageBucket: "learning-auth-39695.appspot.com",
    messagingSenderId: "564074943011",
    appId: "1:564074943011:web:77ad66a9828f4bebaf9796",
    measurementId: "G-BBXZQY2V7S"
})

export const auth = app.auth();
export default app;
step 2 :- Lets make our own custom hook useAuth using context API in AuthContext.js to handle the authentication
import React, { useContext, useState, useEffect } from "react"
import { auth } from "./firebase"

const AuthContext = React.createContext()

export function useAuth() {
  return useContext(AuthContext)
}

export function AuthProvider({ children }) {
  const [currentUser, setCurrentUser] = useState()
  const [loading, setLoading] = useState(true)

  function signup(email, password) {
    return auth.createUserWithEmailAndPassword(email, password)
  }

  function login(email, password) {
    return auth.signInWithEmailAndPassword(email, password)
  }

  function logout() {
    return auth.signOut()
  }

  function resetPassword(email) {
    return auth.sendPasswordResetEmail(email)
  }

  function updateEmail(email) {
    return currentUser.updateEmail(email)
  }

  function updatePassword(password) {
    return currentUser.updatePassword(password)
  }

  useEffect(() => {
    const unsubscribe = auth.onAuthStateChanged(user => {
      setCurrentUser(user)
      setLoading(false)
    })

    return unsubscribe;

  }, [])

  const value = {
    currentUser,
    login,
    signup,
    logout,
    resetPassword,
    updateEmail,
    updatePassword
  }

  return (
    <AuthContext.Provider value={value}>
      {!loading && children}
    </AuthContext.Provider>
  )
}
that's it, firebase makes it really easy for authentication. Here our AuthContext provides currentUser, login, signup, logout, resetPassword, updateEmail, updatePassword values which we can use in any component as per the need for example in login page we can use login value from AuthContext and we can pass email and password as the parameter.
Let's create a signup page
Signup.js
import React , { useRef, useState } from 'react'
import { Card, Button, Form, Alert } from 'react-bootstrap'
import { useAuth } from './AuthContext'
import { Link, useHistory } from 'react-router-dom';

function Signup() {


    const emailRef = useRef();
    const passwordRef = useRef();
    const passwordConfirmRef =useRef();

    const { signup } = useAuth();

    const [error, setError] = useState('')
    const [loading, setLoading] = useState(false)

    const history = useHistory();

    async function handleSubmit(e){
        e.preventDefault()

        if(passwordRef.current.value !== passwordConfirmRef.current.value){
            return setError('passwords do not match')
        }
        try{
            setError("");
            setLoading(true);
            await signup(emailRef.current.value, passwordRef.current.value)
            history.push('/');
        } catch{
            setError('failed to create an account')
        }
        setLoading(false);
    }

    return (
        <>

        <Card>
            <Card.Body>
                <h2 className="text-center mb-4">Sign Up</h2>
                {error && <Alert variant="danger">{error}</Alert>}

                <Form onSubmit={handleSubmit}>
                    <Form.Group id="email">
                        <Form.Label>Email</Form.Label>
                        <Form.Control type="email" ref={emailRef} required />
                    </Form.Group>
                    <Form.Group id="password">
                        <Form.Label>Password</Form.Label>
                        <Form.Control type="password" ref={passwordRef} required />
                    </Form.Group>
                    <Form.Group id="password-confirm">
                        <Form.Label>Password Confirmation</Form.Label>
                        <Form.Control type="password" ref={passwordConfirmRef} required />
                    </Form.Group>

                    <Button disabled={loading} type="submit" className="w-100">
                        Sign Up
                    </Button>
                </Form>
            </Card.Body>
        </Card>

        <div className="w-100 text-center mt-2">
            Already have an account ? <Link to="/login">Log In</Link>
        </div>

        </>
    )
}

export default Signup;
Here I have used react-bootstrap to design the UI, you can use whatever you are comfortable with but the concept remains the same.
For this Signup.js page we just imported our custom hook useAuth and destructured the signup function and just with all this we have made our signup page without worrying much about the backend.
This almost remains the same for Login page as well, let's build Login page now
Login.js
import React , {useRef, useState} from 'react'
import { Card, Button, Form, Alert } from 'react-bootstrap'
import { useAuth } from './AuthContext'
import { Link, useHistory } from 'react-router-dom';

function Login() {


    const emailRef = useRef();
    const passwordRef = useRef();

    // destructuring login functionality from useAuth hook
    const { login } = useAuth();

    const [error, setError] = useState('')
    const [loading, setLoading] = useState(false)
    const history = useHistory();


    async function handleSubmit(e){
        e.preventDefault()

        try{
            setError("");
            setLoading(true);
            await login(emailRef.current.value, passwordRef.current.value);
            history.push('/');
        } catch{
            setError('failed to sign in')
        }
        setLoading(false);
    }

    return (
        <>

        <Card>
            <Card.Body>
                <h2 className="text-center mb-4">Log In</h2>
                {error && <Alert variant="danger">{error}</Alert>}

                <Form onSubmit={handleSubmit}>
                    <Form.Group id="email">
                        <Form.Label>Email</Form.Label>
                        <Form.Control type="email" ref={emailRef} required />
                    </Form.Group>
                    <Form.Group id="password">
                        <Form.Label>Password</Form.Label>
                        <Form.Control type="password" ref={passwordRef} required />
                    </Form.Group>

                    <Button disabled={loading} type="submit" className="w-100">
                        Login
                    </Button>
                </Form>
                <div className="w-100 text-center mt-3" >
                    <Link to="/forgot-password">forgot password?</Link>
                </div>
            </Card.Body>
        </Card>

        <div className="w-100 text-center mt-2">
            Need an account ? <Link to="/signup">Sign Up</Link>
        </div>

        </>
    )
}

export default Login;
Here we have build our Login page as well, just after a user is logged in we can redirect them to the user dashboard or any page where user needs to be authenticated. Next we can do is to make a protected route so that only a authenticated user can view the user dashboard and for that we can have another blog, till then you can see the source code here of this project and live demo of this project here.